Whether you're dealing with existing concrete floors or a newly-laid concrete slab, you will need to find a way to prevent rising damp or other problems related to water ingress. As solid as concrete floors appear, they are, in fact, relatively porous, allowing moisture to migrate through the concrete surface via capillary action, which can lead to serious problems and a lot of expense.
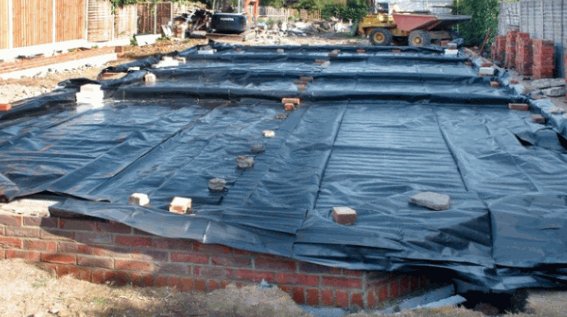
Therefore, contractors are obliged to damp proof concrete floors during the initial construction phase, and this is usually a protective layer of heavy-duty plastic sheeting laid either beneath or on top of the concrete slab, depending on the soil conditions in the area.
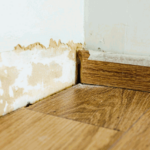
Damp floors and increased moisture levels on concrete floor slabs can be a sign that the damp proofing has failed or that no DPM floor membrane was installed in the first place.
At DryCore, we have seen hundreds of cases like this and have helped clients to overcome the problem using various professional damp proofing methods.
Typically, they are rolls of durable plastic high-density Polyethylene that come in different thicknesses. UK regulations recommend that the minimum for damp proofing concrete floors should be 1200 gauge. These form a horizontal barrier that controls moisture content and prevents damp issues from affecting the property.
Installing a damp proof membrane (DPM) on a concrete floor is crucial to prevent moisture from rising through the floor and causing issues such as dampness, mould, wet/dry rot, and damaging floor coverings like carpets and wooden floors. What's more, 'prevention of damp' is covered by UK building regulations to ensure that all construction work meets specific standards, so this is an essential step.
If your existing concrete floor is displaying the classic signs of damp, such as black mould, mildew, and excess moisture, then you may need to lay a plastic damp proof membrane to fix the problem.
It's a relatively straightforward process, but it's helpful to have a step-by-step guide on damp proof membrane installation, so we have prepared one for you:
You can also check out our post "How To Damp Proof A Wall" for more additional insights.
Your first job is to carefully remove all skirting boards in the room and store them safely. Next, sweep and vacuum the floor surface to ensure that the concrete floor is clean, completely dry, and free from any debris, dust, or contaminants.
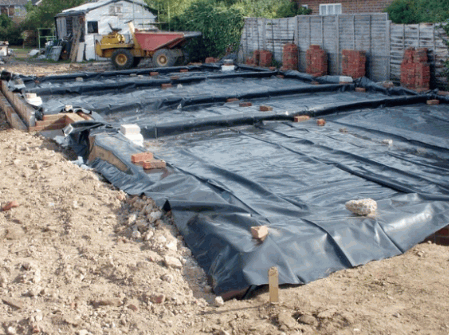
Measure the length and width of the concrete floor to determine the size of the damp proof membrane needed. Remember to add a few extra inches to the measurements to allow for coverage up the walls. Roll out the DPM and use a tape measure to mark the correct dimensions. Cut the membrane using a utility knife or scissors.
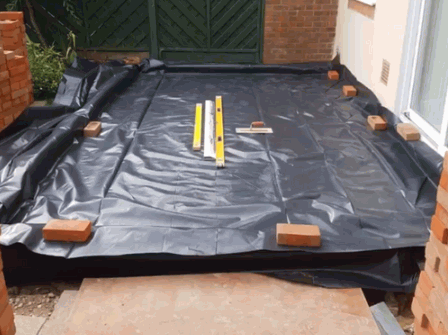
Carefully lay the damp proof membrane over the concrete floor, making sure it covers the entire surface. If your room is larger than the width of the DPM, you may need to join multiple sheets together. Overlap the edges by at least 6 inches (15 cm) to ensure a watertight seal.
If you're using a polythene DPM, you can use double-sided adhesive tape or DPM jointing tape to seal the overlapping edges together. Bitumen-based DPMs often come with self-adhesive overlaps, making this step easier. Make sure you press the seams firmly to create a secure bond.
If your DPM is particularly large or if you expect heavy foot traffic in the area, you can also fix the DPM to the floor using DPM fixing plugs. These plugs can be driven through the DPM and into the concrete floor, anchoring it in place.
Once the DPM is securely in place, use the utility knife or scissors to trim any excess membrane along the edges of the floor. Be careful not to cut too close to the sealed edges to avoid compromising the watertight seal.
Extend the damp proof membrane up the walls and join it onto the wall DPM using adhesive or DPM fixing plugs. Ensure there is a good overlap between the floor DPM and the wall DPM to maintain an airtight seal and a continuous barrier against moisture.
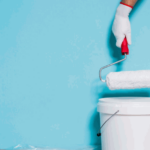
Once the damp proof membrane is in place and all edges are sealed, you can proceed with installing a concrete screed or your chosen flooring material (such as laminated wooden flooring) on top.
The DPM will protect the floor covering from moisture rising from the concrete.
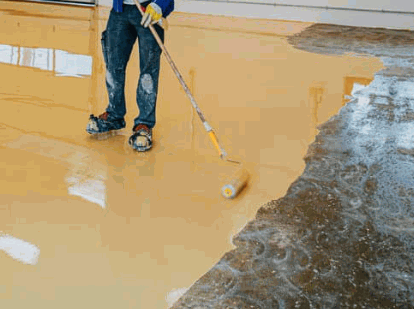
Liquid membranes are an alternative to having a plastic damp proof membrane installed and are regarded by most experts as being the better option as they are essentially waterproof. That is, a liquid membrane doesn't just prevent water ingress, it keeps the moisture within the concrete slab.
Damp proof membranes, on the other hand, allow the moisture to sit on the surface of the concrete floor slab.
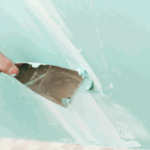
The installation process is simpler as it can be applied directly onto concrete slabs with minimal surface preparation using rollers, squeegees, or trowels. Once it has dried, you can lay the final surface, such as laminate flooring or vinyl.
One drawback is that a liquid membrane damp proof course is pretty expensive compared with other damp proofing measures, which is why most people, understandably, go for plastic sheeting for damp proofing concrete floors. Our post "How Much Is A Damp Proof Course" maybe interest you. You can check it out.
Remember: Always follow the manufacturer's guidelines and recommendations when installing the damp proof membrane. If you're unsure about any part of the installation process, consider seeking professional advice or assistance.
This is a general guide to installing damp proof membranes, which we hope you find useful. If you need further assistance with this or advice on other waterproofing methods, like the cavity drainage system, or you are battling damp in your home or business, we are always here to help!
While you're browsing, don't forget to check out our dedicated article on "How Long Does Damp Proofing Last" to discover more valuable information and expert recommendations.