We get a lot of rain in the UK - as you probably noticed!
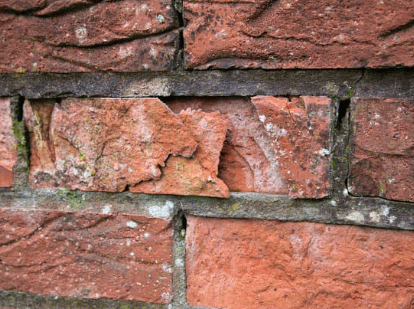
That means there's often plenty of groundwater lying around, and this sits in the soil against our external walls and is soaked up by the porous masonry. Once inside, it makes its way up masonry walls via capillary action, where it can reach as high as 1.5 metres.
This is known as 'rising damp', and it can cause a lot of problems! Oddly enough, there are those who dismiss the idea of rising damp, despite the obvious damage and despair it causes. But when you've experienced this first-hand, you know that this problem is real and that it is no joke.
The DryCore team has witnessed too many cases where homeowners have faced the devastation caused by water ingress leading to penetrating damp and rising damp, which is why we always endeavour to provide as much advice and information on the subject as we can (on top of our expert damp proofing solutions).
And that's why we've put together this guide on how to damp proof a wall. Hopefully, this will help you to avoid the frustration, expense, and upheaval caused by damp walls!
In a way, there should be no real reason for anyone to ask this question other than out of pure curiosity: your walls should already have a damp proof course (DPC) that was installed during construction. For more learnings, you can check out our post "What Is A Damp Proof Course".
In the majority of cases, a high-density polyethylene damp proof membrane is used, which is essentially heavy-duty plastic. Older buildings could have a lead or slate course, and asphalt or bitumen has also been used.
However, damp proof membranes can fail, either because they have been damaged or were poorly fitted in the first place. Or, they simply wore out and degraded over time.
Compulsory damp proofing has been the norm since it was introduced to the construction industry in 1875, but many of these materials have now become unstable. Even in modern buildings, damp proof courses can fail because they were installed incorrectly due to poor workmanship. In addition, they have a limited lifespan, which means they are no longer effective, putting your building at risk. For more information, check out our post “How Long Does Damp Proofing Last".
Garden landscaping can sometimes cause problems: removing trees or shrubs that soak up groundwater leads to saturated soil. Also, if the ground level is raised, it can breach the damp proofing and allow moisture to rise up the walls.
So, how do you damp proof your walls to protect your property?
Here are some methods commonly used in the UK, mostly for damp proofing brick walls:
A chemical damp proof course is probably the most popular way of treating rising damp. It's ideal for cavity walls and is seen as the most DIY-Friendly option as it is possible for people to do the job themselves.
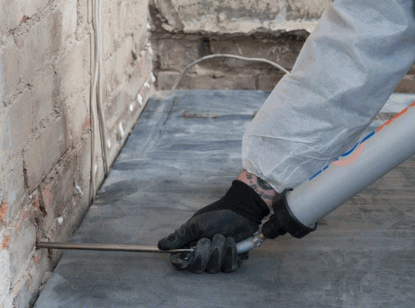
In this method, a series of holes are drilled into the mortar joints just above the existing damp proof membrane (assuming there is one). Next, a chemical damp proof cream or gel is injected into the holes, and these are capped.
The gel or cream is usually made of bitumen or silicone, and this forms an impenetrable barrier to prevent moisture from rising up through the matrix.
However, while this is excellent for cavity walls, it's not always the best option for rubble-infill walls on older buildings.
Electro-osmosis uses a copper cathode that's buried at ground level outside and goes up through your walls. This generates an osmotic flow to repel water away from the building, effectively stopping rising damp. While you can get a professional to fit this for you, kits are available if you prefer to do the job yourself.
This is a great choice for old buildings with solid or rubble-infill walls.

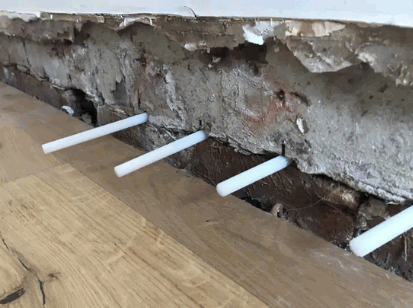
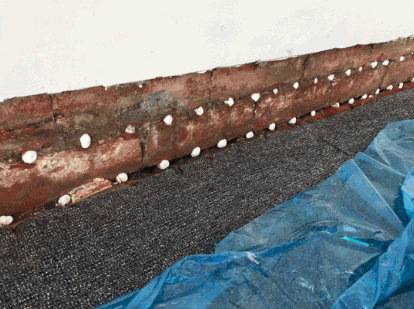
This is a similar process to the chemical damp proof course, as holes need to be drilled in the mortar above your old DPC, but water-repelling rods are used instead of a cream or gel.
Again, it's possible for you to do this job yourself as it's usually a straightforward process.
The rods can be installed in walls with high or low alkalinity, and can be fitted in warm or cold walls, even if they are freezing! Each rod is impregnated with a type of silicone (usually siloxane or silane) that leaches out into the mortar, effectively creating a new damp proof course. Don't also miss our article "How Long Does A Damp Proof Course Last" - it offers valuable insights into this important topic.
It takes about 6 months for the silicone to disperse into the mortar, after which the rods can be removed and the holes filled with new mortar, which makes them a good choice for older buildings.
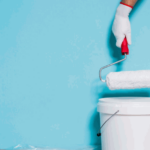
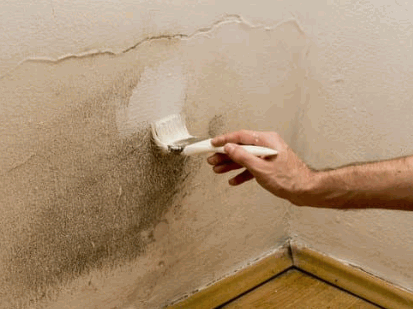
This is used to treat damp walls internally, but it rarely works on its own; it's no good covering your interior walls with damp proof paints if the cause hasn't been treated correctly!
However, once the source of the problem has been identified and fixed, it won't hurt to apply a good-quality damp proof paint to the affected walls. It's worth mentioning here that damp proof paints won't cure damp, but they can be handy in keeping mould growth at bay and reducing the effects of damp on internal walls. While you might need a new damp proof layer on the external walls as well as internal damp proofing, applying this special paint will ensure that you are doubly protected.
These paints can be applied by brush or roller, and once they are dry, you can paint over them with normal emulsion paint.
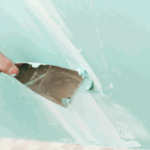
Treating penetrating damp or rising dampness on external walls is generally easier, as all you need to do is drill into the mortar and apply the treatment.
However, dealing with damp internal walls is often a different matter, as you usually need to strip back the plaster at least to the height that the dampness and staining have reached. This is because the hygroscopic salts damage the plaster and stay within the matrix, absorbing water from the atmosphere that will result in more staining and more damage.
A damp proof membrane is probably the best way to deal with damp internal walls, as it forms a protective barrier that traps moisture behind it and lets it evaporate naturally rather than seep through and ruin your decor. It is easily cut to size and fixed in place with fixing plugs. The surface is textured to make a good key for plaster, render, or dot and dab plasterboard. To learn more about how soon can you plaster after damp proofing, take a look at our post.
Damp proof membranes are usually present inside houses as well, laid beneath or on top of concrete slabs, and joined to the damp proofing in the walls. While these can fail, they aren't exposed to the same stresses and strains as those on the outside and tend to last longer. Our post "How To Install Damp Proof Membrane On Concrete Floor" maybe interest you. You can check it out.
Yes, unless you want to subject your property to the risk of cosmetic and structural damage that could thousands of pounds to repair. Rising damp and penetrating damp are particularly serious as they can affect the joists and beams, comprising the structural integrity of the building.
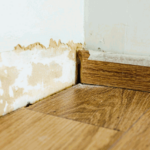
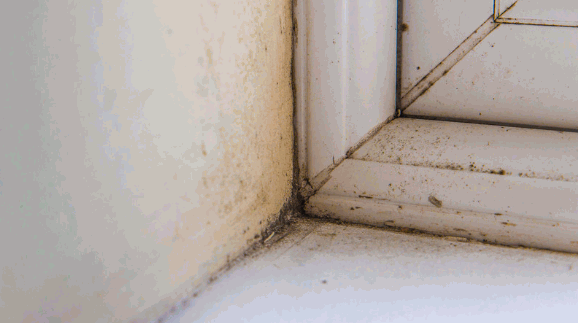
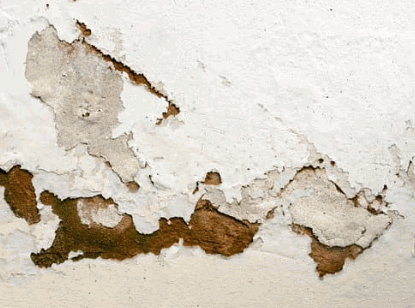
Have you got black mould growth or damp internal walls, particularly on the lower half of your walls? Is the paint flaking or the wallpaper peeling? Do your skirting boards feel soft and spongey? Have you noticed crumbling plaster on your walls? Are there damp patches with 'tide marks' where hygroscopic salts have been deposited?
These are all indications that you have a problem with damp that needs to be dealt with. Is it rising damp? Possibly, but it could also be penetrating damp or condensation caused by excess moisture due to poor ventilation.
One good indication of rising damp is when you see salt crystals in the damp patches on your walls. These naturally occurring salts are either from the surrounding soil or are present in the construction materials, drawn out along with the moisture, and deposited on the wall surface when the water evaporates. These salts aren't associated with other types of damp problems, and when they appear in concentrated form, they actively draw moisture from the air.
One of the key factors in overcoming damp problems is the correct identification of the cause. While it could be rising damp or penetrating damp, mildew and mould growth can be the result of condensation caused by inadequate ventilation within the property.
It's all very well damp proofing walls, but if your problem is caused by a lack of ventilation or a leaking gutter, then the problem will remain.
Even so, you need to make sure that the damp proofing on your internal and external walls is sound and effective.
A qualified professional from a reputable damp proofing company will always investigate the situation thoroughly, and if your existing damp proof course has failed, they will recommend an appropriate solution. They'll also offer to undertake the job if you don't feel equipped or confident enough to tackle it yourself. You can also check out our post "How Much Is A Damp Proof Course" for more additional insights.
With many years of experience in treating penetrating damp and rising damp problems, we have acquired a great deal of knowledge on the subject. We like to share the benefit of our experience to help homeowners to avoid potentially expensive and distressing situations, such as how to treat rising damp in order to prevent further deterioration.
While it's possible for most people to take on the projects above, we understand at DryCore that it's not for everyone and that health conditions make it too much of a challenge or an impossibility. If this is your situation, or you simply prefer not to tackle this kind of work, we